I last edited this draft back in 2020. I vaguely recall wanting to write more here and probably revisit the diagrams, which were made entirely using Asymptote. But it’s a good post and worth publishing.
I made my first Möbius strip during my sophomore year of high school in math class. Since then, I have been fascinated by their construction and mere existence. I share them with every person I can, basing my own presentation on a mix of my math teacher’s introduction, provided so many years ago, and a wonderful talk given by Matt Parker at the Royal Society.
To fully understand a Möbius strip, we have to understand where it comes from. So, let’s make a simple paper loop. Begin by cutting a long rectangular strip off your sheet of paper; an inch thick will do fine. Next, tape both ends of the strip together to form a wide, short cylinder.
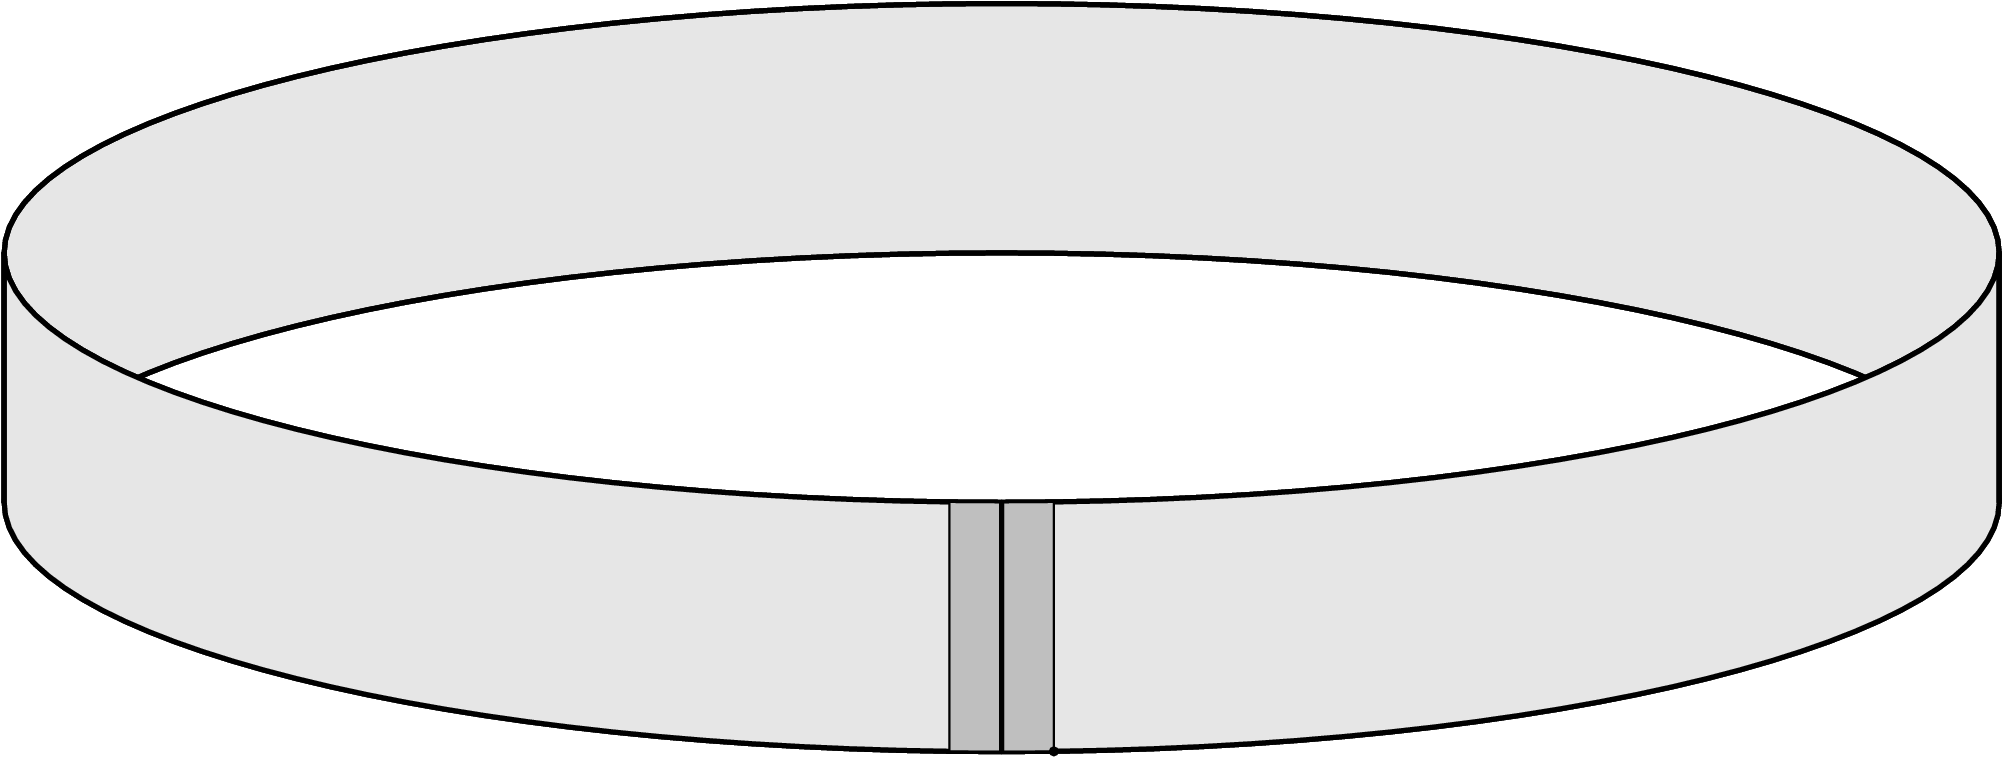
How many “sides” would we consider this paper loop to have? That is, without going over the edge of the loop, how many colors do you need to color the ring?
Based on the coloring definition, there are clearly two sides: an “inside” and an “outside”. So far, so good.
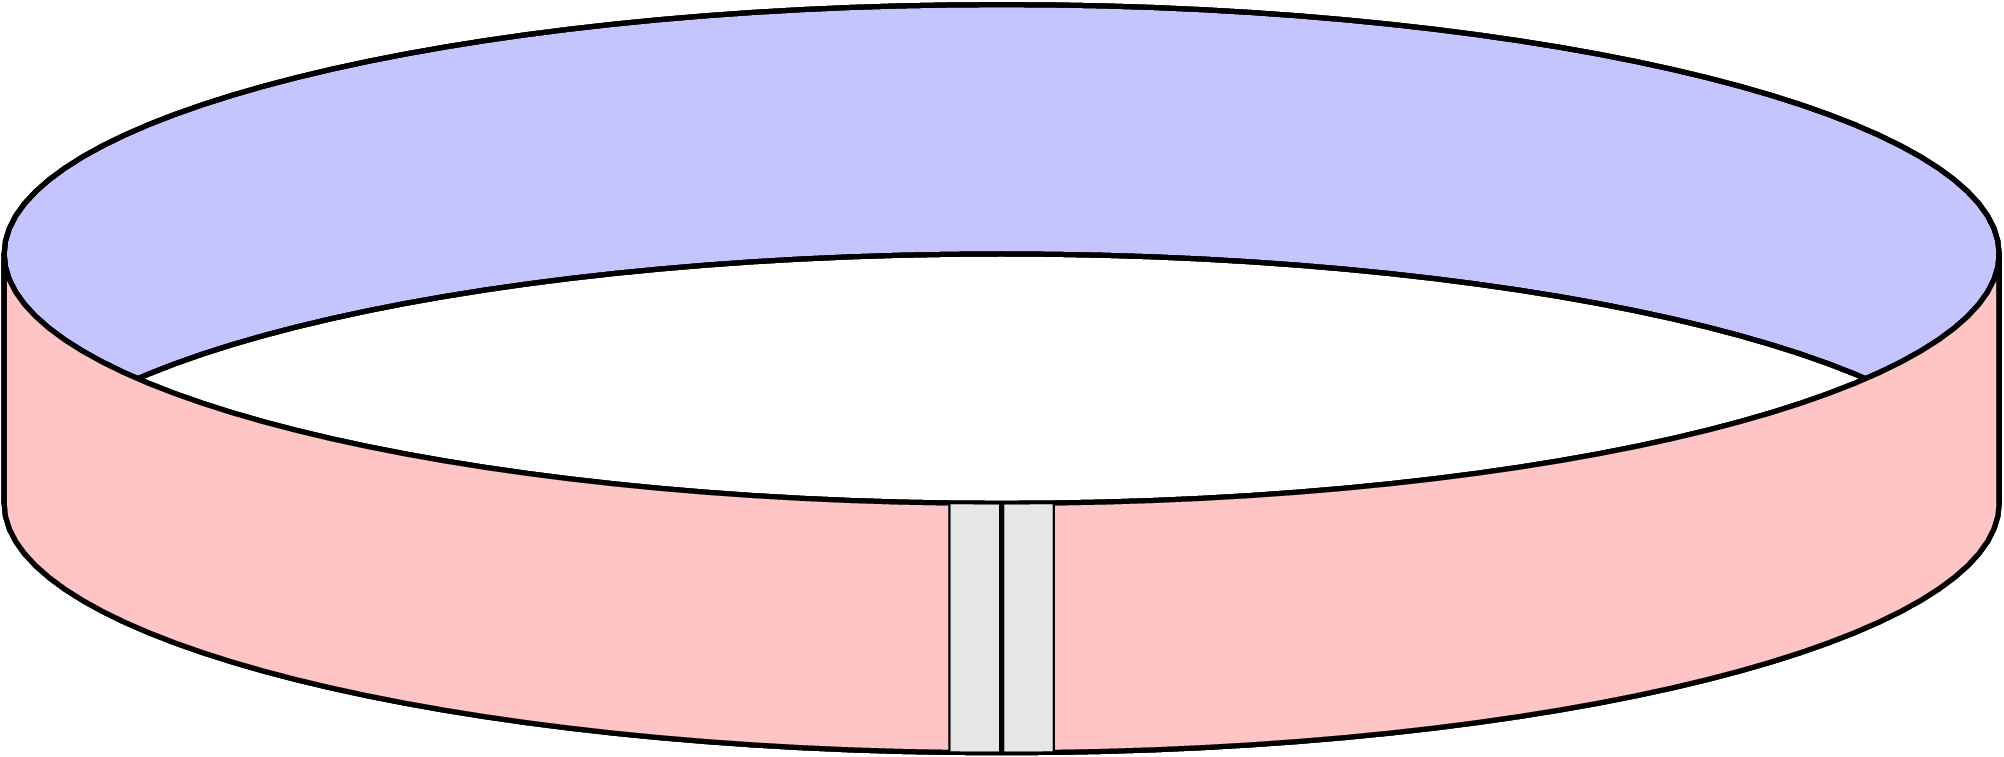
What happens if we cut this ring “in half”, slicing horizontally as shown below? Most everyone should have no trouble figuring this out.
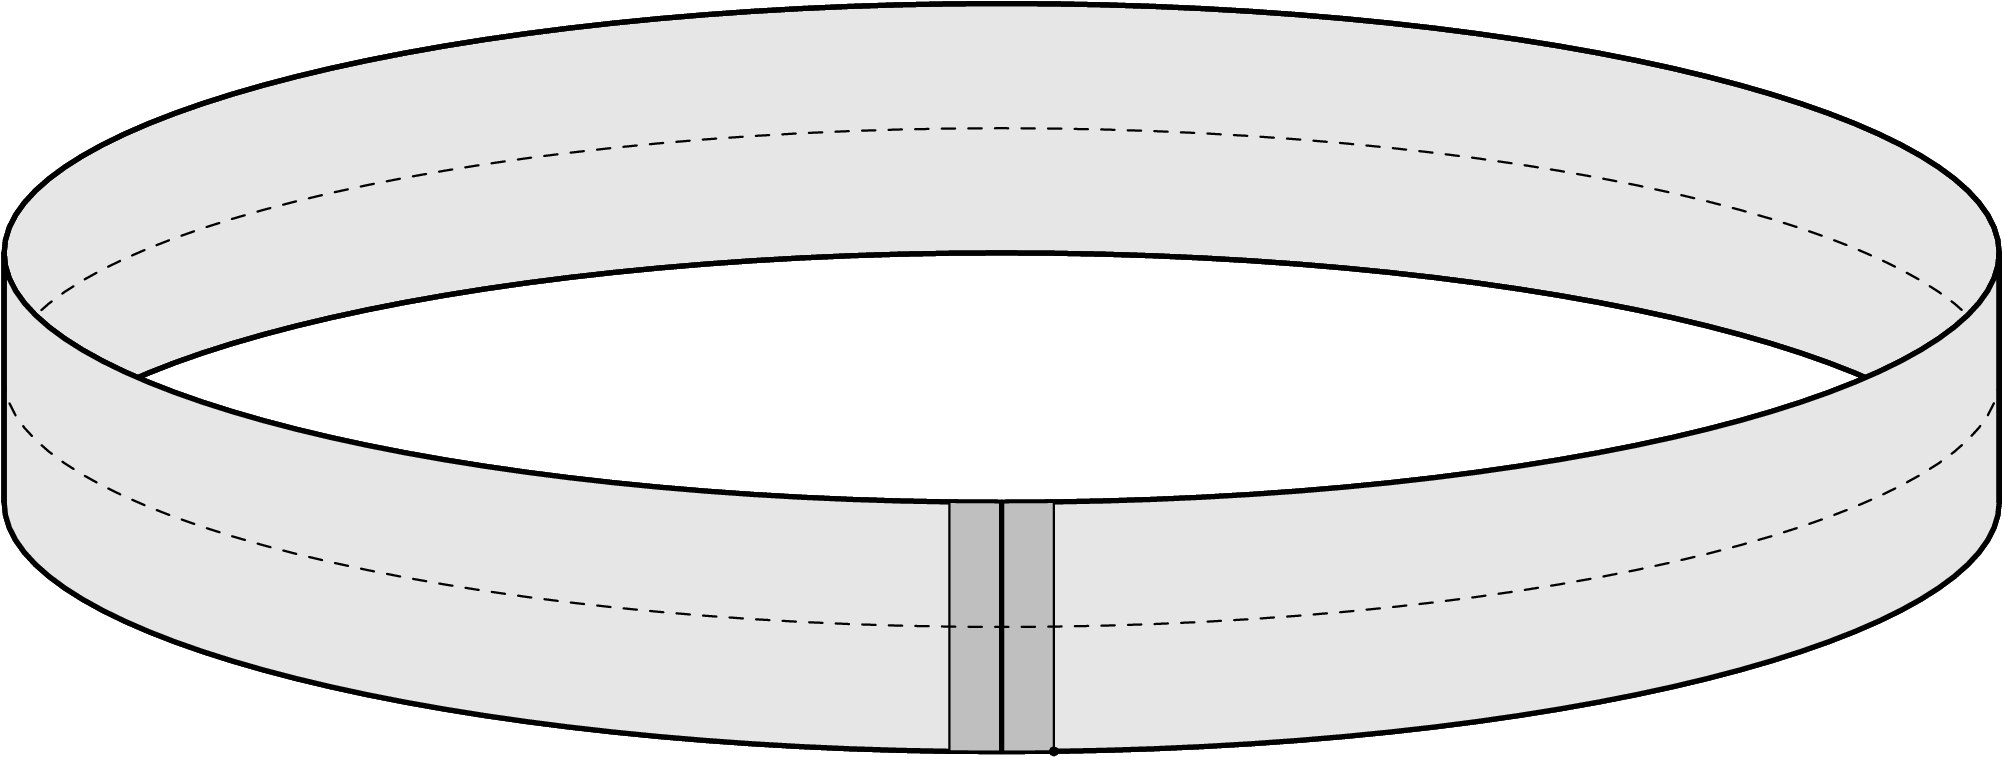
If you fold the loop a bit to get started, then cut straight through horizontally across the dashed line shown above, we end up with two rings similar to the first, each half as tall.
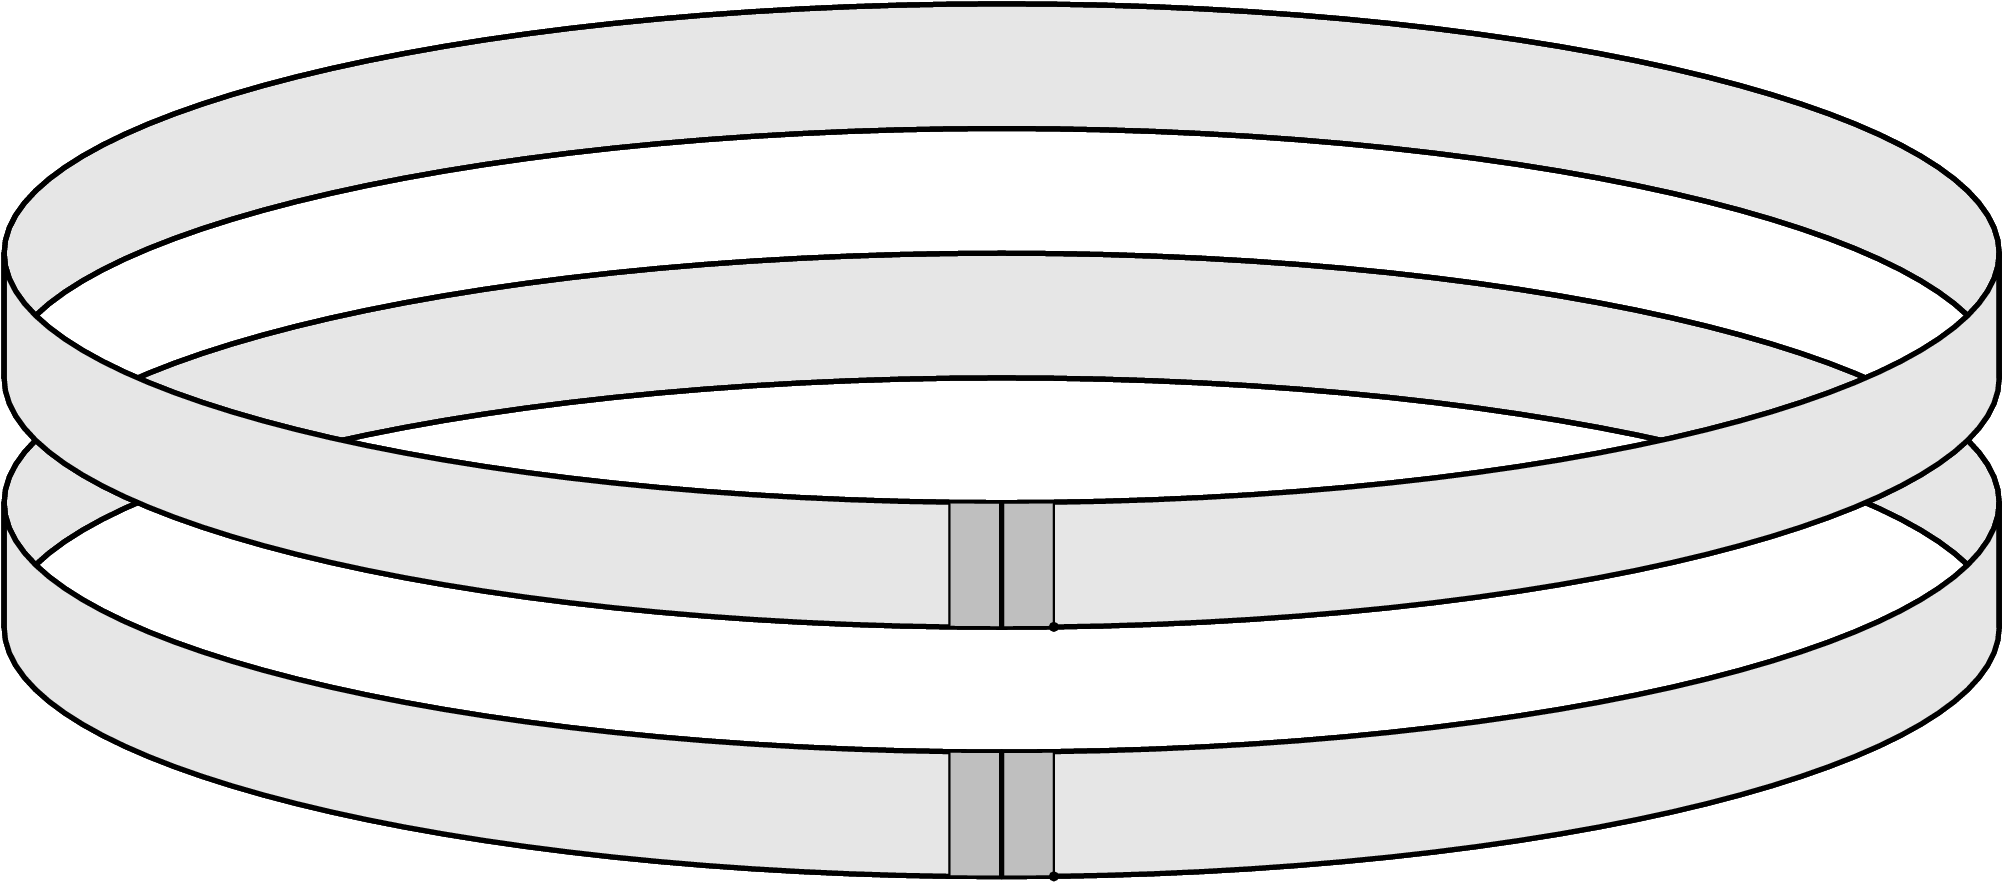
To intuitively “prove” this must be the case, consider coloring the loop “above” the dashed line and “below” the dashed line using different colors. The loop will separate along the line, and hence we’ll get two loops of different colors.
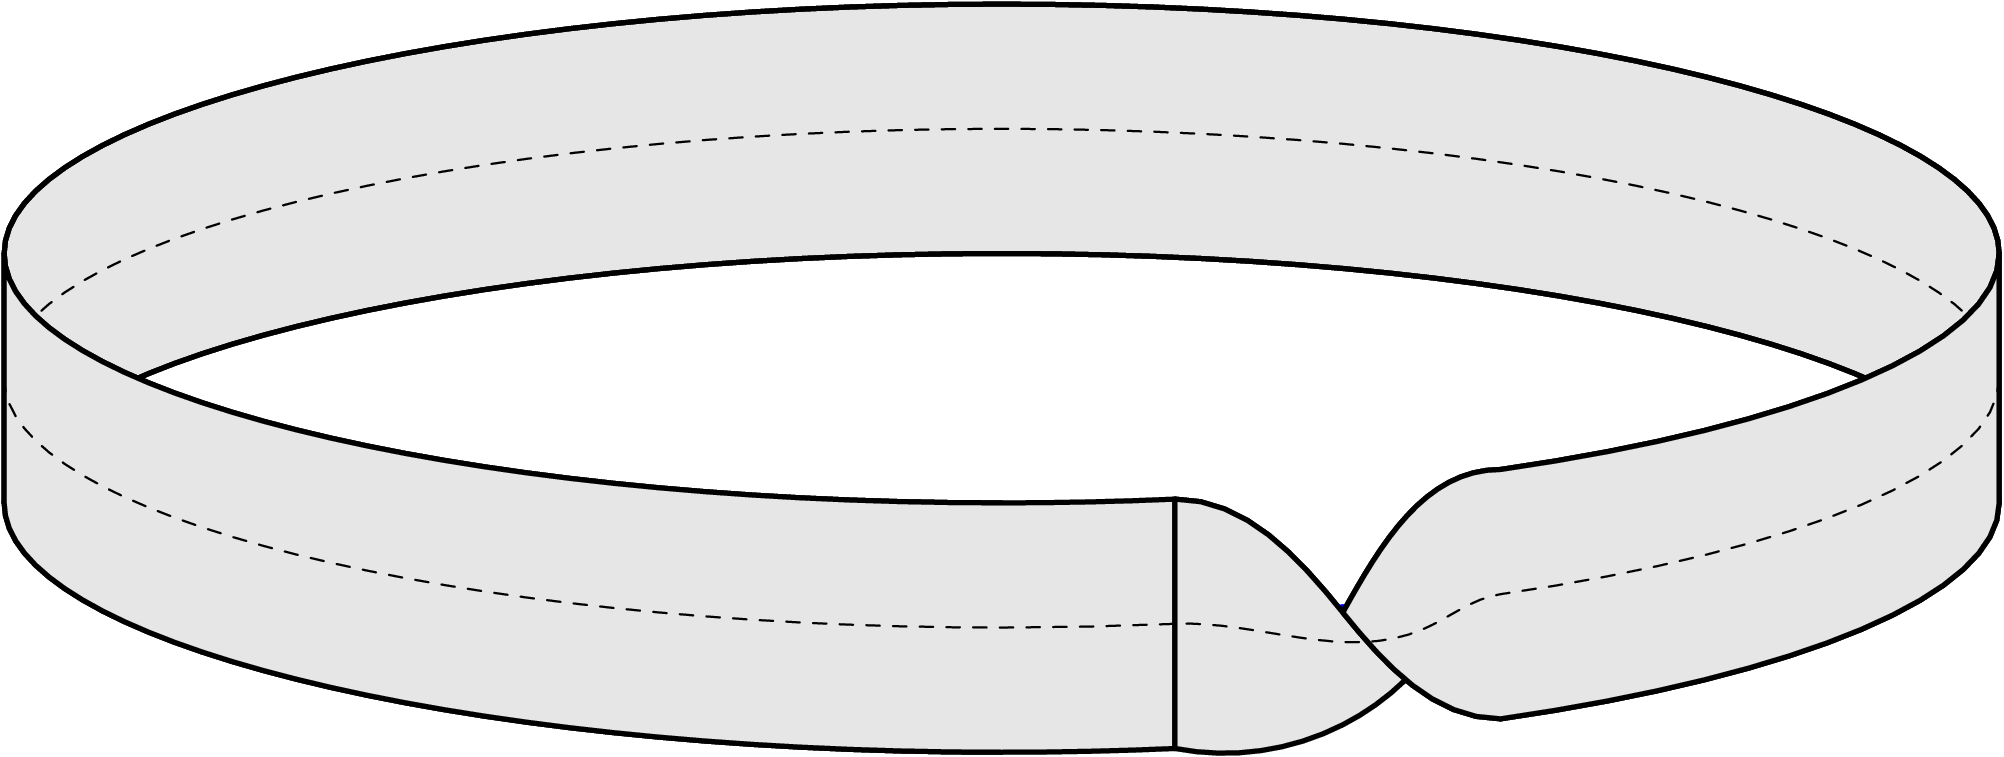
We’ve done nothing remarkable so far. But now, we need to add a twist. Create a similar strip of paper as before, but before taping the two ends together, give one side a half twist. If you want to be working ahead, keep track of how you’re twisting it. I am twisting the right side “inward” this time.
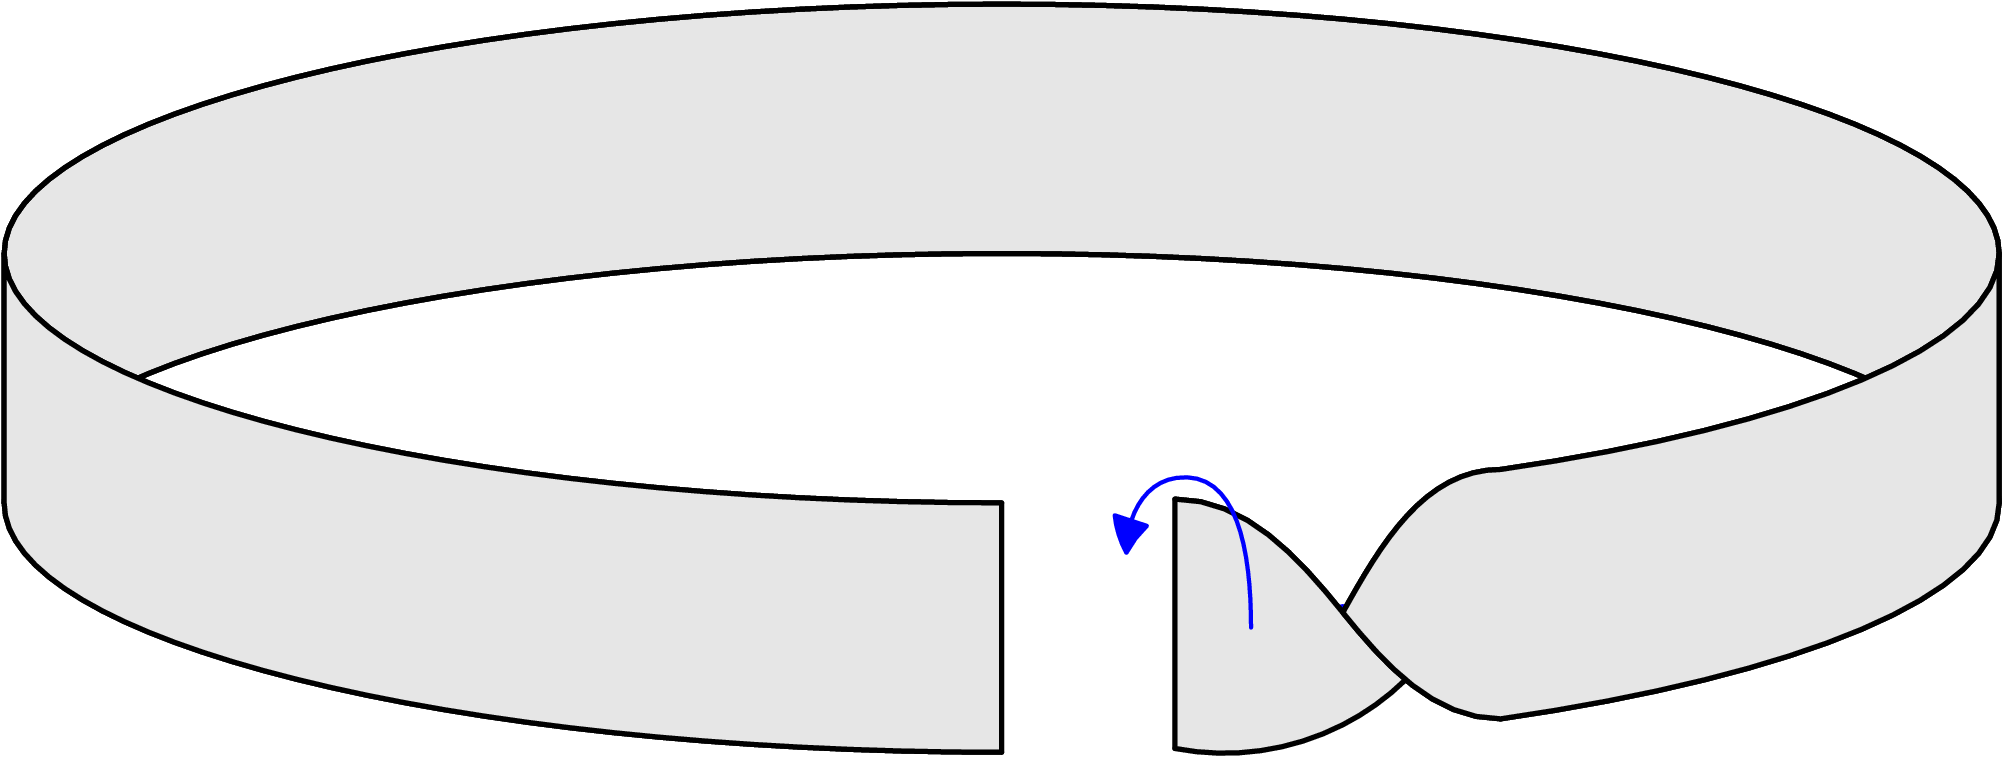
Now attach the two edges and tape them together as before. The question is: How many sides does this new shape have? You can use the same test of seeing how many colors it takes without going over a sharp edge. Start at some point, begin coloring, and see where it takes you.
I like to think about coloring what we can see of the “inside” first. However, due to the twist, we’ll also end up coloring the small twisted piece that connects to the “outside” red as well.
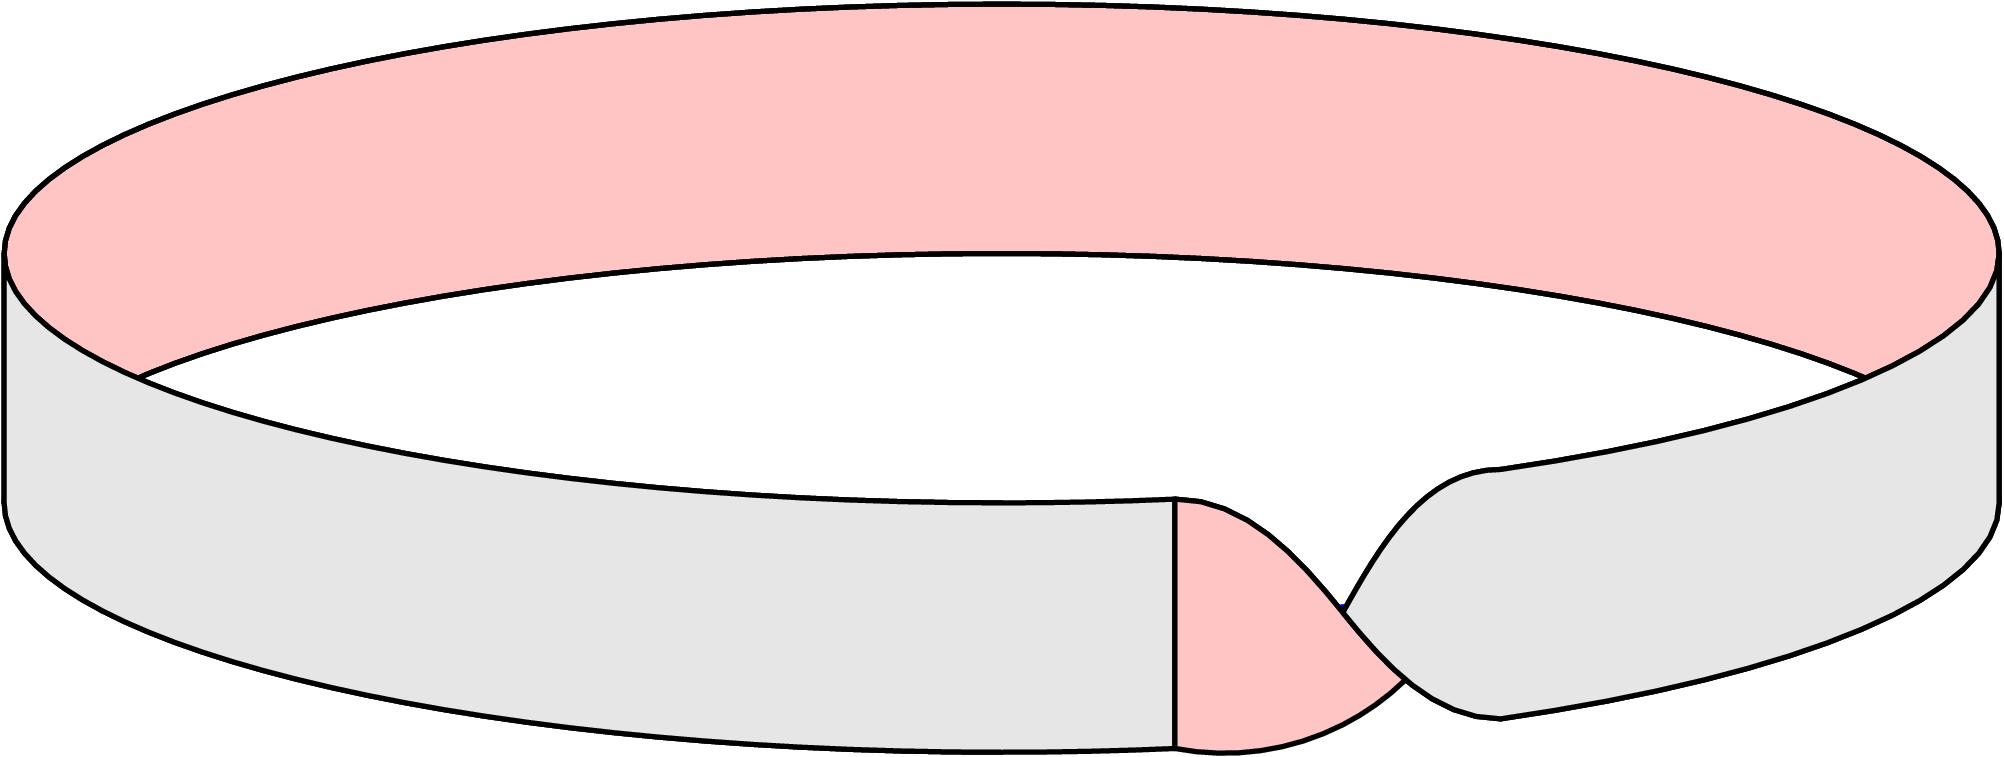
We continue to color. We have not crossed over any of the “sharp” edges on the top or bottom, so red is still a fine color to use. We wrap all the way around what looks like the “outside”, and see that the entire shape can be colored using only red. Based on our earlier definition, this shape must have exactly one side! We call this particular one-sided loop a Möbius Strip.
The natural question to consider next is what happens if we cut through the middle, as we did with the paper loop? Give it a shot. Recall earlier that I mentioned using coloring “above” and “below” the dashed line through the middle to understand how the loop will separate into two separate loops of different colors. What happens if you begin coloring on one side of the dashed line in the diagram below?